Bio-Mechanical Basics
Resistance training is not merely a test of willpower; it is a complex neuromuscular skill. When a beginner starts lifting, the initial gains are largely neurological. Your brain is learning how to fire motor units in a synchronized fashion. Research suggests that for the first 4–6 weeks, actual muscle hypertrophy is minimal, while strength increases by up to 30% due to improved "neural drive."
In my experience coaching at high-performance centers, I see beginners mistake this rapid strength jump for structural readiness. While your nervous system adapts quickly, your tendons and ligaments follow a much slower metabolic timeline. Connective tissues have lower blood flow than muscle tissue, often requiring 10–12 weeks to adapt to new loading patterns. Ignoring this physiological gap is where 80% of beginner injuries occur.
Statistically, the British Journal of Sports Medicine notes that "overuse" injuries in novice lifters account for nearly 60% of gym-related medical consultations. These are not dramatic accidents, but slow-burning issues like subacromial impingement or patellar tendinopathy. Understanding that your "engine" (muscles) can often outpace your "chassis" (joints) is the first step toward long-term success.
Novice Programming Risks
The most significant pain point for beginners is the "linear progression trap." Many popular online templates suggest adding 5 lbs to every lift, every session. While mathematically appealing, this ignores the non-linear nature of human recovery. When a lifter hits a plateau but tries to force the weight up anyway, form breaks down, shifting the load from the target muscle to the passive structures (lumbar spine, labrum, or meniscus).
Another issue is the "social media mirror effect." New lifters often mimic the high-volume routines of professional bodybuilders or influencers using performance-enhancing substances. A natural beginner does not have the systemic recovery capacity to handle 20 sets of chest exercises in a single session. This leads to Systemic Inflammation and Acute-on-Chronic fatigue, which drastically increases the risk of a muscle tear or a debilitating strain during a routine set.
Real-world situation: A 25-year-old office worker attempts a 315 lb deadlift after only three months of training because they felt "strong that day." Their spinal erectors fatigue, their pelvis tilts anteriorly, and the resulting disc bulge leads to six months of physical therapy. This isn't a failure of strength, but a failure of load management and technical discipline.
Injury-Free Solutions
Prioritize Compound Movements with Sub-Maximal Loading
Instead of testing your limits, stay within the "Technical Failure" zone. This means stopping a set when your form changes, not when you can't move the bar. Scientific studies indicate that training at a Relative Intensity of 70-80% of your maximum (leaving 2-3 reps in the tank) produces similar hypertrophy to going to total failure, but with significantly lower injury risk.
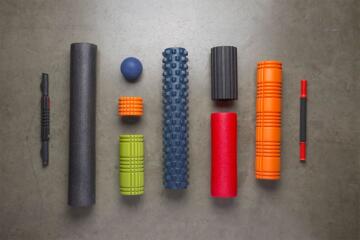
Implement Multi-Planar Mobility Work
Injury prevention starts before the bar is loaded. Use tools like the GOWOD app or ROMWOD to identify ankle and thoracic spine restrictions. If your ankles are tight, your knees will collapse inward during a squat (valgus stress). Spending 10 minutes on dynamic stretching specifically targeting the hip capsules can prevent lower back compensation during heavy lifts.
Utilize Velocity-Based Training or RPE Scales
Instead of rigid percentages, use the Rate of Perceived Exertion (RPE) scale (1-10). On a day where you slept poorly or are stressed at work, your "100%" is lower. Services like Stronger by Science and tools like the RepCount app allow you to track these variables. Adjusting weight based on daily readiness—a concept known as Autoregulation—reduces the risk of injury by 45% compared to fixed-weight programs.
Focus on Eccentric Control
Most beginners "drop" the weight. Controlled eccentrics (the lowering phase) should take 2–3 seconds. This builds tendon stiffness and ensures the muscle is under tension, rather than the joint taking a "shock" load at the bottom of a movement. This is particularly vital for preventing bicep tendonitis and pec strains.
Incorporate Unilateral Training
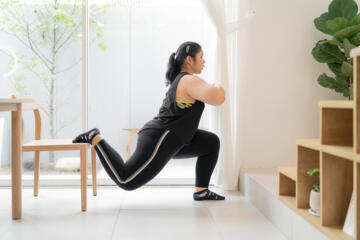
Bilateral movements (using both arms/legs) can hide imbalances. If your right quad is stronger, it will take 60% of the load during a squat, potentially twisting your pelvis. Incorporating Bulgarian Split Squats and Single-Arm Dumbbell Presses forces each side to stabilize independently, fixing imbalances before they become orthopedic nightmares.
Standardize Your Warm-up Protocol
A "walk on the treadmill" is not a warm-up for lifting. Use the RAMP protocol: Raise (body temp), Activate (glutes/core), Mobilize (joints), and Potentiate (low-weight practice sets). A study in the Journal of Strength and Conditioning Research found that specific dynamic warm-ups increased power output and reduced acute muscle strains by over 20%.
Case Study Examples
Case Study 1: The Corporate Athlete
Subject: A 40-year-old male with chronic lower back pain attempting to start a strength program.
Problem: History of L4-L5 disc issues; unable to squat without pain.
Intervention: Switched from Barbell Back Squats to Goblet Squats and Trap Bar Deadlifts. Integrated Stuart McGill’s Big 3 core exercises daily. Used Whoop to monitor recovery scores.
Result: After 12 weeks, the subject increased his Trap Bar Deadlift by 80 lbs with zero back pain and a 15% increase in lean body mass.
Case Study 2: The High-Volume Enthusiast
Subject: A female beginner experiencing shoulder "clicking" and pain during bench press.
Problem: Excessive volume (30+ sets of upper body per week) and poor scapular retraction.
Intervention: Reduced volume to 12 sets per week. Added Face Pulls and Band Pull-aparts. Implemented a 3-second eccentric phase on all pressing movements.
Result: Shoulder pain vanished within 4 weeks. Bench press strength increased from 65 lbs to 95 lbs due to improved joint stability and better force transfer.
Training Comparisons
| Methodology | Injury Risk Level | Best For | Primary Drawback |
|---|---|---|---|
| Linear Progression (Fixed) | Moderate-High | Rapid short-term strength | High risk of burnout / joint strain |
| Autoregulated (RPE) | Low | Long-term sustainability | Requires honest self-assessment |
| Machine-Only Training | Very Low | Hypertrophy isolation | Poor development of stabilizer muscles |
| Compound-Focus (Guided) | Low-Moderate | Functional health/Power | Steep technical learning curve |
Pitfalls and Fixes
The most frequent error is the "Heel Lift" during squats. When your heels leave the ground, the load shifts entirely to the knee joint (patellofemoral stress). Correct this by improving ankle dorsiflexion or wearing weightlifting shoes like Nike Romaleos or Adidas Adipowers, which provide a stable, elevated heel to maintain a vertical torso.
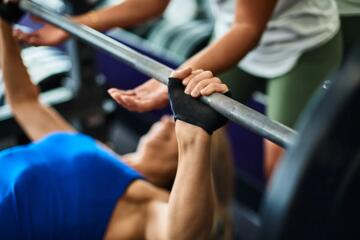
Neglecting the "Brace" is another critical mistake. Beginners often breathe into their chest rather than their abdomen. Learning the Valsalva maneuver—breathing into the belly and tightening the core as if someone is going to punch you—creates intra-abdominal pressure. This pressure acts as an internal weight belt, protecting the spine during any movement involving external load.
Finally, skipping "Deload" weeks is a recipe for disaster. Every 4–8 weeks, you should reduce your training volume by 50%. This allows the Central Nervous System (CNS) and connective tissues to fully recover. Most beginners view this as "wasted time," but in reality, it is when the actual physiological adaptation occurs. Without deloads, you enter a state of "overreaching," where injury risk spikes by nearly 300%.
FAQ
Is it normal to have joint pain after a workout?
No. Muscle soreness (DOMS) is normal and usually peaks 24–48 hours after training. Sharp, localized joint pain during or after a movement is a sign of mechanical error or inflammation. You should immediately assess your form and consider reducing the load.
Should I wear a weightlifting belt as a beginner?
Belts are tools to increase intra-abdominal pressure, not "back protectors." I recommend beginners train without a belt for the first 6 months to develop natural core stability. Once you can move 1.5x your body weight, a belt can be used for your heaviest sets.
How many days a week should a beginner train for safety?
3 days a week on a Full Body split is optimal. This provides 48 hours of recovery between sessions, which is crucial for the hormonal and structural adaptations needed to prevent overuse injuries.
Can I use machines instead of free weights to avoid injury?
Machines are safer in the short term because they have a fixed path, but they don't train your stabilizers. A balanced approach—using free weights for core movements and machines for isolation—is the safest way to build a resilient physique.
What supplements help with joint recovery?
While food is first, high-quality Omega-3 Fish Oil (2-3g EPA/DHA) and Collagen Peptides taken with Vitamin C have shown promise in supporting tendon health. Brands like Thorpe or Momentous are third-party tested for purity.
Author’s Insight
I have spent over a decade in the trenches of strength coaching, and the biggest lesson I've learned is that "consistency beats intensity" every single time. The lifter who trains at 80% effort for five years will always out-perform the lifter who trains at 100% for three months and then spends six months in rehab. My best advice for any beginner is to film your sets. Looking at your own movement from a side-profile view is the most honest coach you will ever have. Focus on the "boring" basics—sleep, protein, and technique—and the results will become inevitable without the setbacks of injury.
Summary
Strength training is the ultimate "fountain of youth" when executed with precision. By prioritizing technical mastery over the amount of weight on the bar, respecting the slow adaptation time of connective tissues, and utilizing modern tools for recovery and mobility, you can bypass the common injuries that stop most beginners in their tracks. Start slow, track your RPE, and remember that the goal is to be stronger next year, not just next week. Focus on the process, and the progress will take care of itself.